
10 Tips for Your Perfect Bike Tour: Beginner's Guide
Anyone planning a multi-day cycle tour for the first time has many questions: What do I need to take with me? How do I find a suitable route? And how much preparation is really necessary? We'll show you 10 practical tips for your first bikepacking trip - ideal for beginners in Switzerland.
Bikepacking is booming - and rightly so: you are independent, sustainable and closer to nature than with any other form of travel. But the multitude of decisions can be overwhelming, especially when travelling for the first time: Equipment, route choice, training, sleeping bag or hotel?
This article will help you find the perfect way to get started - step by step and with specific recommendations from professionals that you can consult if necessary.
1. Start small and do not overtax
Plan 2-3 days for your first tour. Start with daily stages of 40-60 km and stay in regions with few metres in altitude. This will help you get to know your equipment - without frustration or overloading. Use the SwitzerlandMobility app for this. It allows you to plan your daily tours to perfectly suit your needs. Read the blog about planning your tour SchweizMobil.
2. Test your setup before the tour
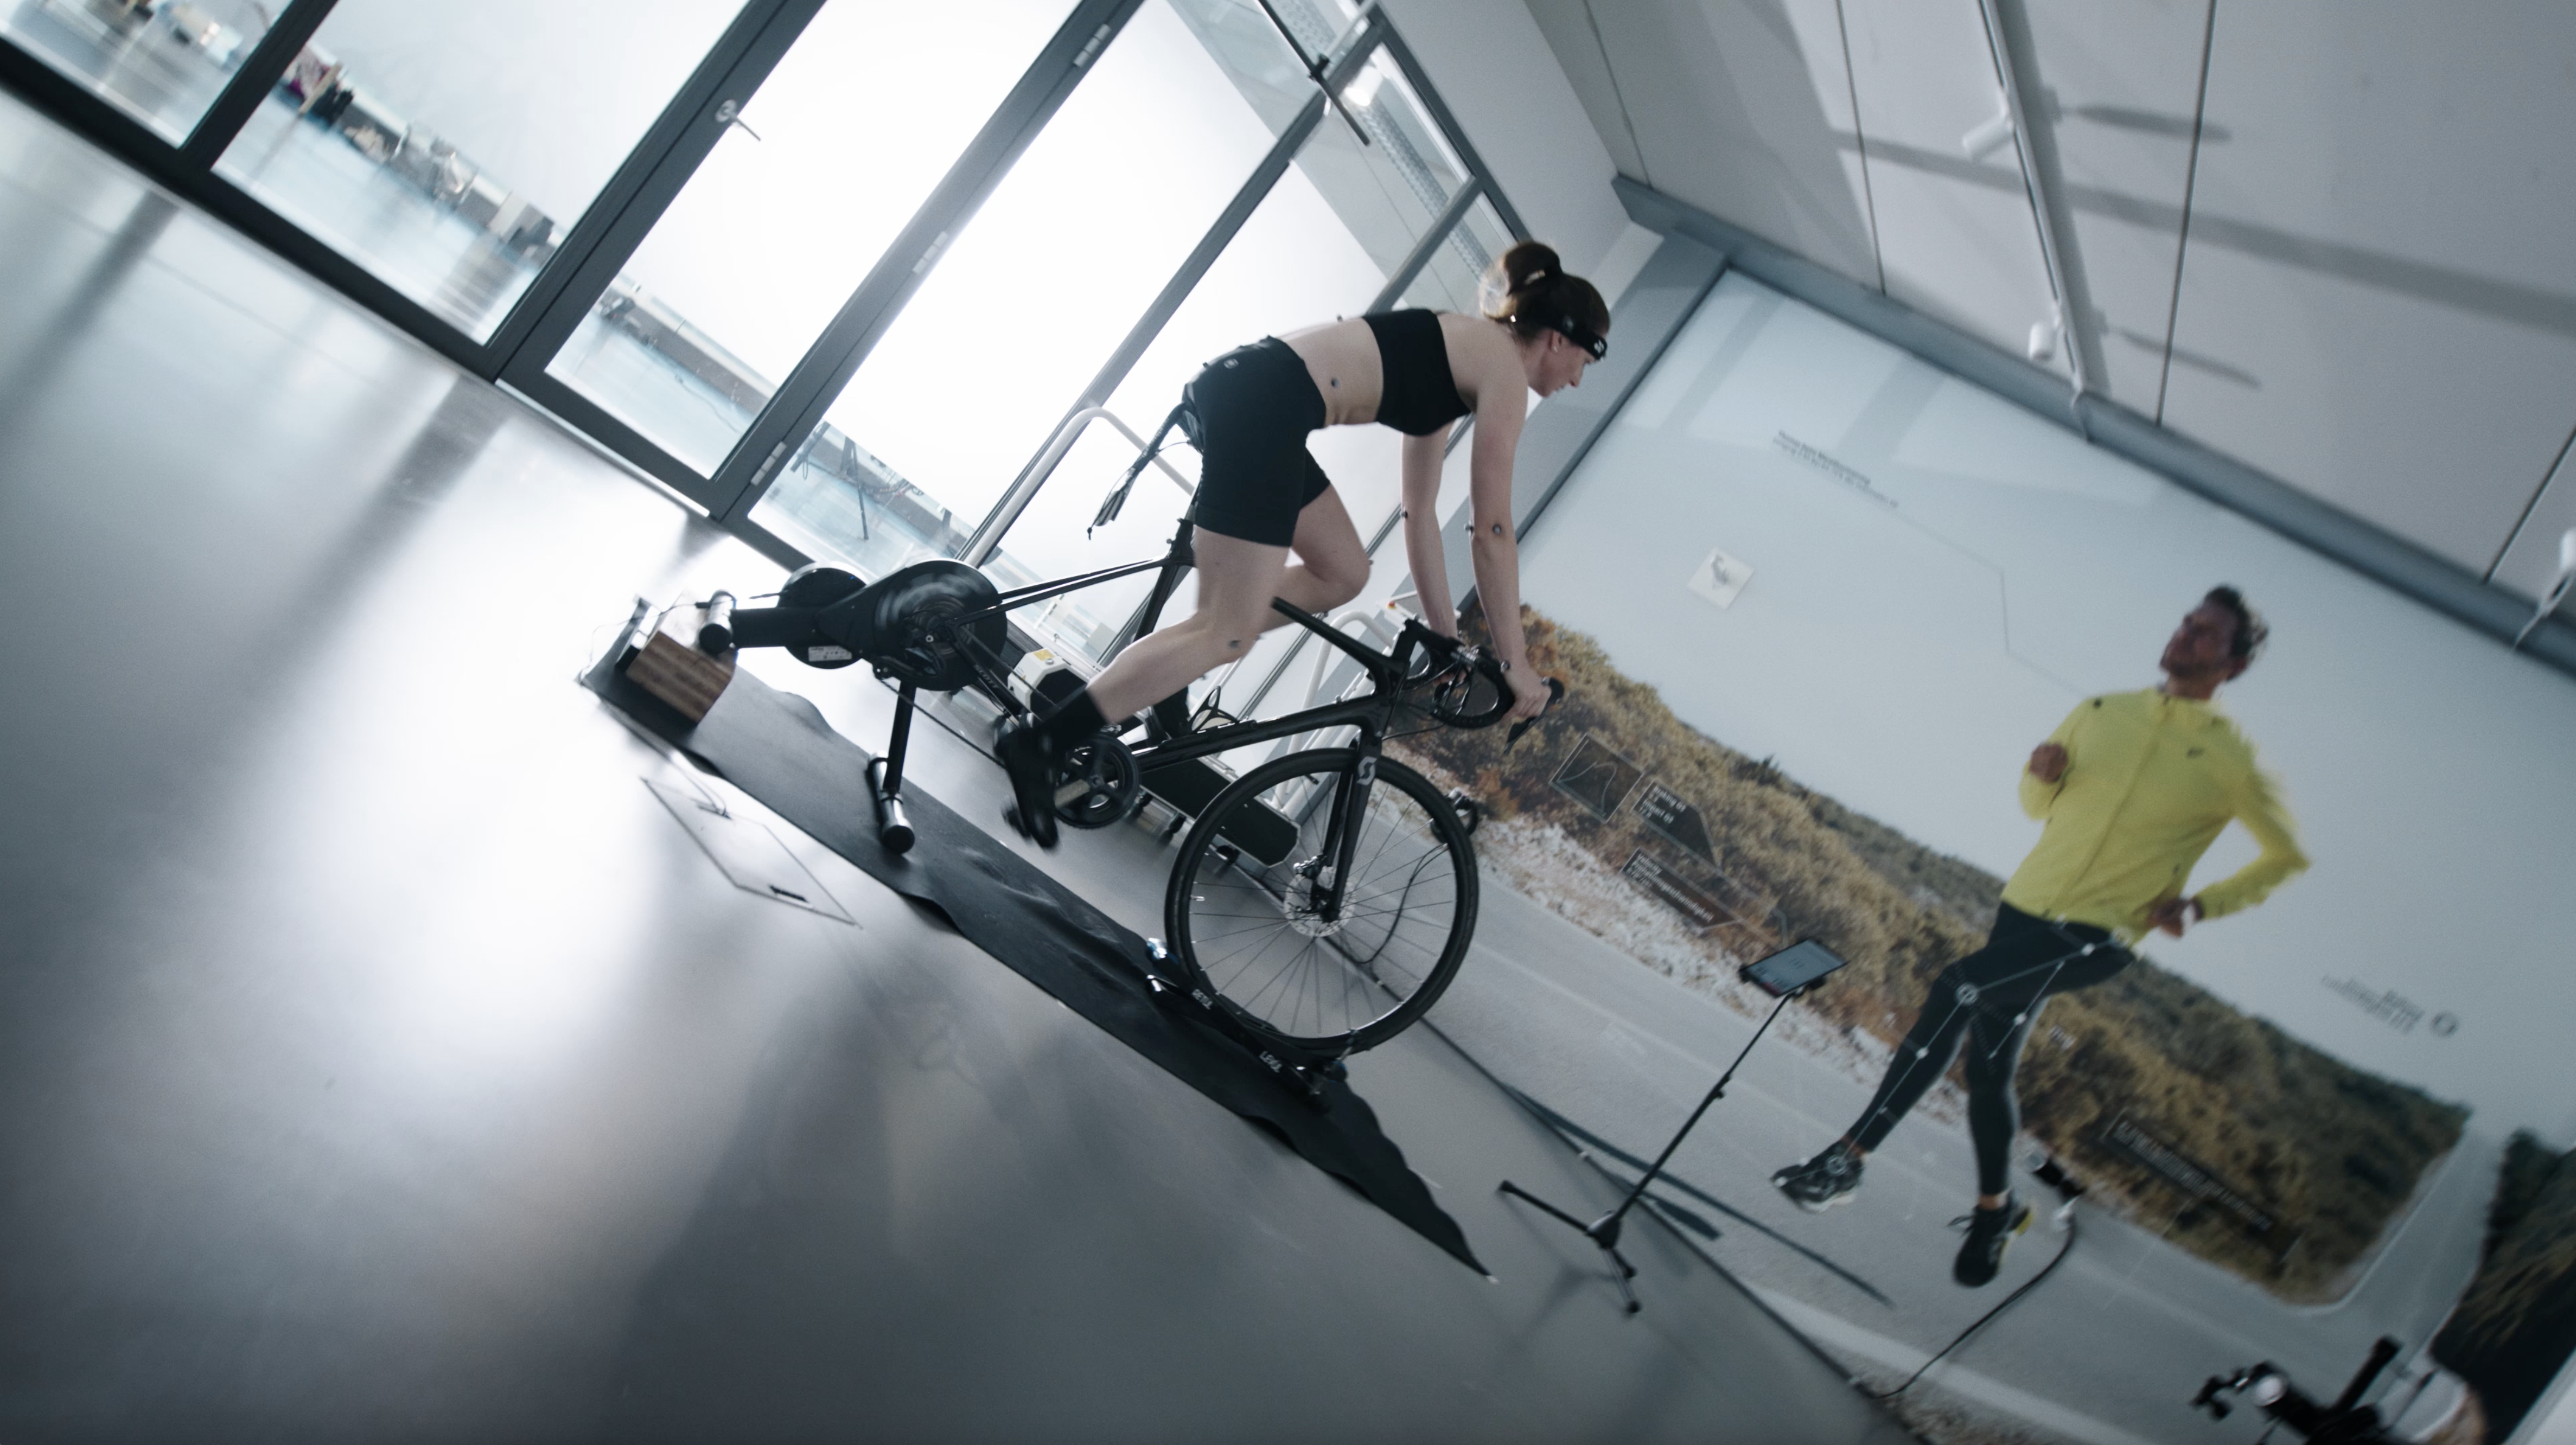
Do a test ride with a loaded bike. This will allow you to find out early on what is rubbing, wobbling or missing - and you can make adjustments. If you would like to take a look at our bikes before your tour or go for a short test ride, you can do so by prior arrangement with us at the SVC in Bern. If you would like to have your bike customised for you, we recommend a bike fitting at swissbiomechanics.
3. Less is more when packing - travelling light and smart on your bike tour
When you're planning a longer bike tour for the first time, it's tempting to pack everything you can - after all, you want to be prepared for every eventuality. But on the first climb at the latest, you realise that every gram counts.
The motto is: less is more. If you pack cleverly, you not only save weight, but also gain comfort, overview and riding enjoyment. In this section, we show you what you should pay attention to when packing - including practical tips. A fully loaded bike feels sluggish, slows you down and can have a negative impact on your riding behaviour. The lighter you are on the road, the more pleasant your tour will be - especially on gravel, on climbs or when you have to carry or push the bike.
Minimalism when packing doesn't mean sacrificing comfort - it means choosing wisely what you really need.
5 principles for minimalist packing
Our packing recommendation: What you really need to take with you
Do you want to know what specifically belongs in a bike bag? Then we recommend this article from VAUDE:
Was gehört in eine Fahrradtasche? – VAUDE Blog
The same applies here: quality before quantity. We rely on VAUDE panniers on our gravel bikes - lightweight, robust and well thought out.
Our tip from practice
A tried and tested trick: lay out everything you want to pack once - and then put 30% of it away again. You'll be surprised what you don't actually need.
Less luggage = more experience
Those who limit themselves to the essentials experience more lightness - not only literally, but also figuratively. Pack smart, ride light, enjoy more intensely.
4. Find out about the route
Which route is scenic, safe and well signposted? Are there wells, shopping facilities and accommodation? Good planning prevents detours and frustration. You can find suitable routes with tips and tricks in our tour suggestions: https://pedalmondo.com/tourenvorschlaege/
5. Clarify accommodation - tent, hostel, inn or all together?
During your bikepacking tour in Switzerland, the question quickly arises: Where do I stay overnight? The choice often depends on the route, the weather and your personal preferences. Would you like to camp in the open air, would you prefer to stay in a cosy inn - or are you looking for a practical hostel with all the trimmings? Fortunately, Switzerland offers a wide range of options that are perfectly tailored to the needs of cycle travellers.
Tent or inn - which is the better choice?
For many bikepackers, the tent is the preferred option as it offers maximum flexibility. You are not tied to fixed locations and can decide spontaneously where you want to sleep. However, pitching a tent in the rain, a lack of sanitary facilities and a lack of comfort can be a challenge.
Inns and hotels offer a welcome rest after a long day in the saddle - including a shower, soft bed and often breakfast the next morning. Many accommodations are specially designed for cyclists and offer secure parking facilities and small repair services.
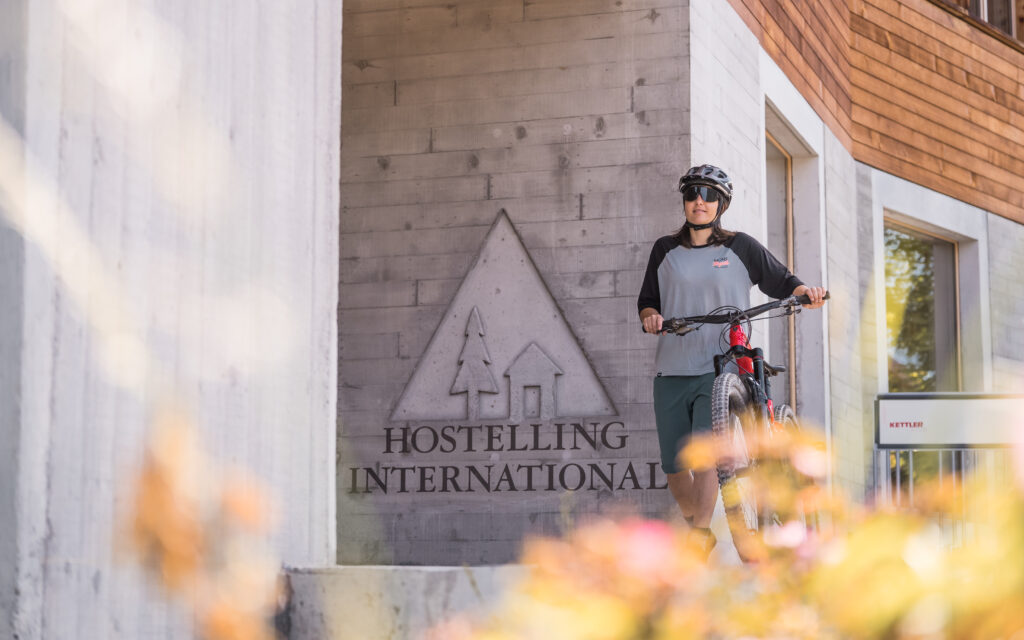
Swiss Youth Hostels: bikepacking with comfort and sustainability
An often underestimated but excellent option: Swiss Youth Hostels. The nationwide network offers around 50 hostels - from urban to alpine - with an excellent price-performance ratio. Particularly practical: many youth hostels are explicitly bike-friendly and have been awarded the ‘Biking’ certificate by HotellerieSuisse. On youthhostel.ch you can filter directly by these and find youth hostels with e.g. bike shelters, e-bike charging stations, washing facilities and packed lunches.
Further advantages for cycle travellers:
- Lockable bike rooms
- Laundry service & drying facilities
- Breakfast buffet always included, packed lunches & evening meals on request
- Focus on sustainability
- Discounted prices with membership
Tip: Membership is worthwhile from just a few overnight stays and can be booked directly online.
The best platforms for your accommodation search
We recommend the following platforms for planning your stage overnight stays:
SchweizMobil
Combines route planning with accommodation search - ideal for cycle tours through Switzerland.
MySwitzerland.com
The official tourism portal lists numerous ‘Bike Hotels’ with bike-friendly offers.
TCS Camping
Campsites with ideal infrastructure for bikepackers: E-bike charging stations, bike parking spaces, tools. Particularly popular:
TCS Camping Lucerne - on Lake Lucerne
TCS Camping Basel - near France & Germany
TCS Camping Zurich - ideal for a city stopover
youthhostel.ch
The Swiss Youth Hostels platform - with filter option for ‘bike-friendly’.
Booking.com & Airbnb
For more comfort or spontaneous nights in between. Filter specifically for ‘bike-friendly’
Wild camping: adventure with responsibility
Wild camping is not generally prohibited in Switzerland, but is regulated differently from region to region. It is often prohibited in the Alps or in nature reserves in particular. If you choose this option, make sure you are well informed about local regulations and don't leave any rubbish behind - nature and respect go hand in hand.
Conclusion
Whether tent, inn, youth hostel or flat - Switzerland offers you a wide range of accommodation options for every preference and budget. Those who are flexible and in touch with nature will be happy camping. If you are looking for comfort and functionality, youth hostels and TCS campsites are the perfect choice. And those who want that little bit extra will find what they are looking for on platforms such as Booking.com or Airbnb. The following applies to everyone: planning is everything - and good platforms are
6. Keep your bike in good shape
A bikepacking adventure in the Swiss Alps is only truly relaxing if your bike is in perfect condition. Nothing is more annoying than stopping in the middle of breathtaking scenery with a puncture or a broken part. Especially in remote areas, it can be difficult to get help quickly. That's why it's crucial to check your bike thoroughly before the tour and to keep it in good shape on a regular basis. Here are some important
1. check brakes - your life insurance
The brakes are one of the most important safety elements of your bike. Especially in mountainous regions such as Switzerland, where steep climbs and descents are the order of the day, it is essential that they function reliably. Check whether the brake pads are thick enough and whether the brake fluid (for hydraulic brakes) is at the right level.
Tip: Make sure that the brakes do not squeal and that the braking effect starts immediately. The braking force should remain constant on long descents.
2. adjusting the gears - for a smooth ride
Correctly adjusted gears are particularly important in order to be able to shift gears without any problems on different types of terrain. On a bikepacking tour, you will often encounter different gradients, and a well-functioning gear system allows you to change gears quickly and adjust your pedalling efficiently.
Tip: Check that all gears shift smoothly and that the chain does not jump off. If you are unsure about the gears, have them checked in a workshop.
3. check tyres - prevention is better than cure
Your tyres will carry you over a wide variety of terrains, from asphalt to gravel and mountain trails. Make sure they have sufficient tread and do not have any cracks or punctures. On longer tours, a flat tyre can quickly become a source of frustration - so always check them in good time!
TipMake sure that your tyres have the correct air pressure. Check this regularly, especially with changing temperatures in the mountains, which can affect the pressure.
4. tools and spare parts - be prepared for breakdowns
Even if you have maintained your bike well, breakdowns can always happen. You should always have a spare inner tube, a small air pump and a multitool with you. Especially in remote regions, it can be difficult to find help quickly.
5. workshops
If a major problem does arise during your tour, there are many places in Switzerland that can help you with repairs. Local bike shops often offer repair services:
- Ski + Velo Center Bern - As an official partner of Pedalmondo, the Ski + Velo Centre is a top address for professional bike maintenance and repairs.
- Local workshops - In many larger cities and tourist areas such as Zurich, Lucerne or Interlaken, you will find local bike repair shops.
6. become a pro at simple repairs
It pays to be able to carry out basic repairs yourself. Changing a flat tyre, oiling the chain or adjusting the brakes - these are all simple tasks that you can easily do on the road. Practice makes perfect, and the better you know your bike, the safer you will feel.
Tip: Familiarise yourself with your bike before the tour and practise simple repairs so that you are not overwhelmed on the trail. There are numerous tutorials on YouTube that can help you learn the most important repairs.
Conclusion
A well-maintained bike is the basis for a safe and enjoyable bikepacking tour. By checking your bike carefully before your trip and equipping it with the necessary tools, you can avoid many problems and concentrate on the adventure. If something does go wrong, there are many workshops in Switzerland that can help you with repairs. Pay attention to small details and be prepared for everything - this will make your bikepacking tour a complete success!
7. Take tools and spare parts with you
When bikepacking, you are often a long way from a workshop - so it's important to be well prepared. Your multitool, spare parts such as a tube and repair kit and a few other tools can make all the difference. Here's a simple guide to getting the most out of your tools.
1. change the tube: this is how you proceed
Tools required: Multitool, spare inner tube, tyre lever, pump
A flat tyre can happen quickly on the road - but with a few simple steps, you can get your bike back on the road. Here you will not only find out how to change the inner tube, but also what you should consider when choosing a replacement tube and how to deal with tubeless tyres.
Step-by-step instructions:
- Remove tyres:
- Shift to the smallest sprocket to reduce the chain tension (rear wheel only).
- Loosen the quick release or thru axle using your multitool.
- Carefully pull the wheel downwards out of the frame.
- Remove tyres:
- Place the tyre lever opposite the valve under the edge of the tyre. Carefully lift the tyre out of the rim.
- Two tyre levers make it easier to loosen the tyre all round.
- Remove and check the tube:
- Pull out the old inner tube. Check the tyre casing and rim for sharp foreign objects (thorns, glass splinters, pieces of wire).
- If you are patching: Clean the area, apply adhesive, wait briefly, press the patch firmly on.
- Insert a new or repaired hose:
- Pump it forward slightly so that it fits in better.
- Insert it evenly into the tyre - make sure that it is not pinched anywhere.
- Refit the tyres:
- Carefully press the tyre back into the rim by hand. Do not use tyre levers when fitting - risk of injury to the inner tube!
- Check that the hose is properly seated.
- Insert & inflate the wheel:
- Put the wheel back into the dropout or the fork. Tighten the quick release or thru axle.
- Pump the tyre to the correct pressure (see section 2).
Mini checklist: Changing the inner tube on the road
- Multitool
- Replacement inner tube - suitable diameter & width, correct valve (Presta or Schrader)
- 2 tyre levers
- Mini pump or CO₂ cartridge
- Gloves (optional)
- Check foreign objects
- Observe the running direction
What should I look out for when buying a replacement hose?
Not every inner tube fits every bike! Look out for:
- Tyre size (diameter): e.g. 28 inch, 27.5 inch, 700C
- Tyre width: The width should match the width of your tyre (e.g. 35-43 mm)
- Valve type: Presta (French valve) or Schrader (auto valve)
- Valve length: Important for deep rims - better too long than too short
- Weight and pack size: Lightweight tubes are good for luggage, but often more sensitive
What repair methods are available?
- Mend the tube:
Classic and effective - especially for small holes. Prerequisite: the hose is clean and dry. - Install replacement hose:
Fastest solution on the road - little effort, immediately ready to drive. - Tubeless with sealing milk:
Many gravel bikes are tubeless. Small holes seal themselves. In the event of major damage, an emergency inner tube is often the only solution. - Tyre plug (for tubeless):
Small rubber sausages that are pressed directly into the hole for larger cuts - similar to a car tyre plug. Very useful for tubeless riders!
Tubeless or inner tube? How to recognise the difference:
- Check valve type:
Tubeless valves are usually firmly screwed into the rim (with rubber seal & lock nut). In tubular tyres, the valve is movably connected to the inner tube. - Tyre performance:
With tubeless tyres, a hole often causes a brief hiss - the sealant escapes. With an inner tube, the tyre usually loses a lot of air abruptly.
What to do with tubeless + sealant - and you still want to fit a tube?
If you have the sealant in the tyre on the road but still need to use a spare tube (because the hole is too big), then:
- Put on gloves (optional)
- Remove one side of the tyre and allow the liquid to drain off or roughly remove it with a cloth.
- Roughly clean the inside of the jacket to prevent the new hose from sticking or being damaged by residue.
- Inflate the hose slightly and install as described above.
- After the tour: Clean the tyre well at home, fill in new sealant if necessary or replace the tyre.
2. pump and tyre pressure: what you need to know
Tools required: Pump (ideally a small, handy bicycle pump or mini pump)
- Gravel bike: 2.0 to 2.5 bar (depending on tyre width and rider weight)
- Touring bike: approx. 3.0 to 3.5 bar
Tip: Higher pressure on tarmac = more efficient. Lower pressure on unpaved roads = more comfort.
Practical tip for hand pump:
If you only have a hand pump with you, you often cannot immediately bring the tyre pressure to the desired value. In this case, pump the tyre to a pressure of around 1.5 to 2 bar to be able to continue riding. Depending on the hand pump, it may take a while to reach the correct pressure - so allow plenty of time.
Recommended pump for bikepacking:
Eine Minipumpe oder Kompaktpumpe mit einem integrierten Druckmesser und einer Möglichkeit, auch höherem Druck standzuhalten, ist ideal. Modelle, die sowohl für Presta- als auch Schrader-Ventile geeignet sind, bieten die grösste Flexibilität. Alternativ ist eine CO₂-Kartusche eine schnelle Lösung, wenn du schnell weiterfahren möchtest.
3. lubricate the chain: Oil or wax?
Tools required: Chain oil or chain wax
| Chain oil | Chain wax | |
| Application | Simple, even when travelling | Only on clean, degreased chain |
| Durability | Long, especially in wet conditions | Shorter, especially in the rain |
| Cleanliness | Attracts dust and dirt | Stays clean, hardly any dirt adhesion |
| Wear and tear | Slightly higher due to dirt | Geringerer Kettenverschleiss |
| For whom? | Allrounder | Dry conditions, low maintenance |
WD-40 is not a chain oil! It lacks lubrication and protective film - it is better to use a proper chain care product.
What to do if the chain is already rusted?
If your chain shows signs of rust, you should clean it thoroughly immediately. The best way to do this is with a chain cleaner and a brush. If the rust is stubborn, you can also use a special rust inhibitor for chains.
Important: If the rust is too severe and you can no longer save the chain by cleaning and lubricating it, you should replace it to prevent further damage to your shifting mechanism.
4. cable ties: why they are important - and what else helps
Benötigtes Werkzeug: Kabelbinder, Gaffa-Tape, Draht, Duct-Tape, Multitool
Cable ties are not only practical, they are a real life insurance policy when it comes to making temporary repairs on the road. But there are other useful things that can help you in an emergency:
Other helpful tools and materials for travelling:
- Gaffa tape (fabric tape):
- Gaffa tape is super versatile - from securing loose luggage to emergency repairs on equipment (e.g. for a tear in a tent or covering broken equipment).
- Tip: Wrap a few metres of gaffa tape around a pen or an empty bottle to save space.
- Wire (piece of tent or wire):
- If something breaks off your bike or equipment (e.g. a frame mount or the pannier rack), you can use wire to secure or connect parts.
- Duct-Tape:
- Much more robust than normal adhesive tape and perfect for all kinds of emergencies, from tyres and luggage to clamping parts on the bike.
- Multitool (with screwdrivers, pliers, knife):
- A good multitool is indispensable. It has almost everything you could need on the go to tighten screws, cut cables or quickly replace parts.
- Sewing kit or sewing thread:
- If you have tears in your panniers or clothing, a small sewing kit can help. It doesn't take up much space and can be extremely useful on your tour.
- Bicycle chain breaker (chain riveter):
- If your chain breaks on the road, a chain tool is essential to get it working again.
Use chain riveters correctly:
A chain riveter is used to repair a broken chain. To use it correctly:
- Make sure that the chain rivet is positioned correctly. Insert the chain so that the pin of the rivet presses directly on the pin of the chain.
- Carefully turn the handle of the chain tool to remove the pin. Make sure that you do not apply too much pressure, otherwise the chain could bend or break.
- Insert the chain tool in the opposite direction to insert the replacement pin or connecting link.
- Test the repair to ensure that the chain is tight and no further problems occur.
Just in case:
With these additional tools and aids, you are well prepared for all eventualities. Remember that even small items such as wire or a multitool can help you experience the adventure safely and smoothly!
8. Stay flexible - even with the weather and route
When bikepacking, things rarely go according to plan, and that's part of the adventure. Unforeseen changes in the weather, detours or closed roads can throw the route off course. Flexibility is the key to enjoying the tour despite such challenges.
1. the weather: react quickly and stay safe
The weather in Switzerland can change quickly, especially in the Alps - from bright sunshine to heavy showers or even thunderstorms in a matter of minutes. It is therefore important to always be prepared for changes in the weather.
- Preparation for all weather conditions: Even if the weather forecast promises a fine day, you should always pack light, waterproof clothing and a rain jacket. This will protect you from sudden showers and help to keep you dry and warm.
- Avoid extreme weather: In the event of heavy rain, thunderstorms or snowfall, you should adjust the route or take a break. Pay attention to weather warnings so that you can make the right decision in good time.
Practical tips for the weather forecast:
- MeteoSchweiz: For precise, national weather forecasts, the MeteoSwiss app is a valuable resource. It not only provides you with general weather data, but also detailed information on specific weather phenomena such as thunderstorms or heavy rain that could affect your bike tour. Thanks to the constant updates, you are always up to date and can quickly prepare for possible weather changes.
2. Diversions and route changes: Stay flexible
It can always happen that your planned route is not passable due to roadworks, closures or other unforeseen circumstances. In such cases, it is important to maintain a flexible attitude and be ready to react quickly to diversions or new routes.
- SchweizMobil bietet eine ausgezeichnete Übersicht über alle offiziellen Routen und informiert dich auch über Strassensperrungen und Umleitungen. Wenn du also auf Hindernisse stösst, kannst du schnell eine Alternative finden, ohne unnötig viel Zeit zu verlieren.
Conclusion
Das Wetter und Umleitungen gehören zum Abenteuer Bikepacking dazu. Mit den richtigen Apps, wie SchweizMobil und MeteoSchweiz, kannst du flexibel und sicher auf Veränderungen reagieren und deine Tour geniessen. Sei immer gut vorbereitet und lasse dich nicht von einem plötzlichen Wetterumschwung oder einer Streckenänderung aus der Ruhe bringen. So wird jede Herausforderung zu einem spannenden Teil deines Abenteuers.
9. Take care of good nutrition & hydration
A multi-day bike tour not only challenges your legs, but also your mind - and both depend heavily on how you eat on the road. "Think of your body like a bicycle: It won't go without fuel," says nutritionist Tamara Wüthrich. She knows what's important if you want to stay physically and mentally fit on tour.
To prevent you from falling into the dreaded energy deficiency in the first place, it is crucial to regularly consume small amounts of readily available carbohydrates - ideally every 60 to 90 minutes. This will keep your blood sugar levels stable and effectively prevent cravings and performance slumps. White bread, pasta or white rice are ideal - easily digestible options that do not put unnecessary strain on the body. High-fibre foods, on the other hand, are better eaten in the evening or during recovery periods, as they take longer to digest and can be heavy on the stomach when you're on the move.
Even if fresh food isn't always available, there are clever ways to maintain a balanced diet. Canned vegetables, flatbreads, red lentils, or even simple porridge meals are easy to transport and can be quickly prepared on the go – for example, with a small gas stove. Convenient: In Switzerland, you can now find many organic farm shops that offer regional vegetables directly from the farm.
Another important topic is recovery after long stages. Micronutrients play a key role here. Especially if you're losing a lot of sweat, you should pay attention to your salt balance – for example, with electrolyte-containing drinks or effervescent tablets from the pharmacy. However, be careful not to supplement indiscriminately – this is especially useful for tours with more than five hours of physical exertion per week.
And another valuable tip: Consciously take your time while eating, even on the go. Taking three deep breaths before a meal will help you eat more mindfully – even during roadside breaks. This way, you'll better sense what's good for you and be able to intuitively decide what your body craves.
You can find out more about this – including breakfast tips, snack ideas and drinking amounts – in the detailed interview with Tamara Wüthrich:
To the interview
10. Take time to enjoy
Stop when the weather is beautiful. Take photos. Talk to people. It's not about the miles, it's about the experiences.
Start stress-free with Pedalmondo
Want to get cycling but don't have your own touring bike or gravel bike? Pedalmondo offers:
- Top-equipped rental bikes with bags
- Flexible pickup in Bern or delivery to SBB stations
- Personal advice for your route and equipment
Discover bikes now: pedalmondo.com